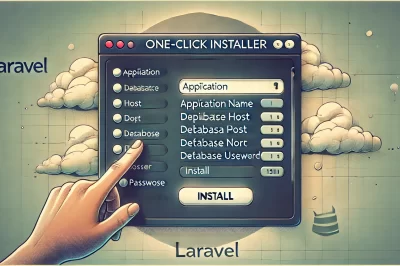
Here’s a README file that provides essential pre-installation requirements and instructions for setting up your Laravel project with the one-click installer:
# Laravel Project Installation Guide

Welcome to the Laravel project! Follow the steps below to ensure your system meets the requirements and to set up the application using the one-click installer.

---

## **Pre-Installation Requirements**

Before you begin, ensure your system meets the following requirements:

### **1. System Requirements**
- **Operating System**: Linux, macOS, or Windows
- **Web Server**: Apache (via XAMPP, WAMP, or similar) or Nginx
- **PHP Version**: PHP 8.1 or higher (check Laravel’s current requirements)
- **Database**: MySQL 5.7+ or MariaDB
- **Composer**: Version 2.0 or higher
- **Node.js and NPM** (optional): Required for front-end assets

---

### **2. Required Extensions**
Ensure the following PHP extensions are enabled:
- OpenSSL
- PDO
- Mbstring
- Tokenizer
- XML
- Ctype
- JSON
- Fileinfo
- BCMath

---

### **3. Software Installation**
1. **Install XAMPP/WAMP (Windows users)**:
   - Download and install [XAMPP](https://www.apachefriends.org/index.html) or [WAMP](https://www.wampserver.com/en/).
   - Ensure Apache and MySQL services are running.

2. **Install Composer**:
   - Download and install [Composer](https://getcomposer.org/).
   - Verify installation by running:
     ```bash
     composer --version
     ```

3. **Install Node.js (optional)**:
   - Download and install [Node.js](https://nodejs.org/).
   - Verify installation:
     ```bash
     node -v
     npm -v
     ```

4. **Laravel Version**:
   - This project is built on **Laravel 10**.
   - Install Laravel globally (if needed):
     ```bash
     composer global require laravel/installer
     ```

---

## **Installation Steps**

### **1. Clone the Repository**
Clone this project from your version control system:
```bash
git clone <repository-url>

cd <project-directory>

composer install

cp .env.example .env

http://localhost/install

php artisan serve

-  Run the Application

http://127.0.0.1:8000
Introduction
A one-click installer enhances your Laravel project by providing a user-friendly, browser-based setup wizard. This simplifies the installation process by allowing users to configure essential settings, such as database credentials, through an interactive interface. Follow this step-by-step guide to build a one-click installer for your Laravel project.
Why Build a Laravel One-Click Installer?
- Ease of Use: Simplifies the setup process for non-technical users.
- Automated Configurations: Handles environment setup, database migrations, and seeders.
- Error Prevention: Guides users step-by-step, reducing misconfigurations.
Steps to Build a Laravel One-Click Installer
1. Middleware to Check Installation Status
Create a middleware to redirect users to the installer if the application is not yet installed.
php artisan make:middleware CheckInstallation
Middleware Code:
namespace App\Http\Middleware;

use Closure;
use Illuminate\Support\Facades\File;

class CheckInstallation
{
    public function handle($request, Closure $next)
    {
        if (!File::exists(storage_path('installed'))) {
            return redirect('/install');
        }

        return $next($request);
    }
}
Register the middleware in app/Http/Kernel.php:
protected $middlewareGroups = [
    'web' => [
        \App\Http\Middleware\CheckInstallation::class,
    ],
];
2. Create the Installation Controller
Create a controller to manage the installation process.
php artisan make:controller InstallController
Controller Code:
namespace App\Http\Controllers;

use Illuminate\Http\Request;
use Illuminate\Support\Facades\Artisan;
use Illuminate\Support\Facades\File;
use Illuminate\Support\Facades\DB;

class InstallController extends Controller
{
    public function showInstallForm()
    {
        return view('install');
    }

    public function install(Request $request)
    {
        $request->validate([
            'app_name' => 'required|string|max:255',
            'db_host' => 'required|string',
            'db_port' => 'required|integer',
            'db_name' => 'required|string',
            'db_user' => 'required|string',
            'db_password' => 'nullable|string',
        ]);

        // Update .env file
        $this->updateEnv([
            'APP_NAME' => $request->app_name,
            'DB_HOST' => $request->db_host,
            'DB_PORT' => $request->db_port,
            'DB_DATABASE' => $request->db_name,
            'DB_USERNAME' => $request->db_user,
            'DB_PASSWORD' => $request->db_password,
        ]);

        // Test Database Connection
        try {
            DB::connection()->getPdo();
        } catch (\Exception $e) {
            return back()->withErrors(['db_error' => 'Database connection failed. Please check your credentials.']);
        }

        // Run migrations and seeders
        Artisan::call('migrate', ['--force' => true]);
        Artisan::call('db:seed', ['--force' => true]);

        // Create the "installed" flag
        File::put(storage_path('installed'), 'Installed on: ' . now());

        return redirect('/')->with('success', 'Installation completed successfully!');
    }

    private function updateEnv($data)
    {
        $env = file_get_contents(base_path('.env'));

        foreach ($data as $key => $value) {
            $env = preg_replace("/^{$key}=.*$/m", "{$key}={$value}", $env);
        }

        file_put_contents(base_path('.env'), $env);
    }
}
3. Build the Installation Blade View
Create a Blade view (resources/views/install.blade.php) for the installer form.
Blade Page Code:
<!DOCTYPE html>
<html lang="en">
<head>
    <meta charset="UTF-8">
    <meta name="viewport" content="width=device-width, initial-scale=1.0">
    <title>Laravel Installer</title>
    <link href="https://cdn.jsdelivr.net/npm/bootstrap@5.3.0/dist/css/bootstrap.min.css" rel="stylesheet">
</head>
<body>
<div class="container mt-5">
    <h1 class="text-center">Laravel Installation Wizard</h1>
    <div class="card mt-4">
        <div class="card-body">
            <form method="POST" action="{{ route('install') }}">
                @csrf
                <div class="mb-3">
                    <label for="app_name" class="form-label">Application Name:</label>
                    <input type="text" id="app_name" name="app_name" class="form-control" placeholder="My Laravel App" required>
                </div>
                <div class="mb-3">
                    <label for="db_host" class="form-label">Database Host:</label>
                    <input type="text" id="db_host" name="db_host" class="form-control" placeholder="127.0.0.1" required>
                </div>
                <div class="mb-3">
                    <label for="db_port" class="form-label">Database Port:</label>
                    <input type="number" id="db_port" name="db_port" class="form-control" placeholder="3306" required>
                </div>
                <div class="mb-3">
                    <label for="db_name" class="form-label">Database Name:</label>
                    <input type="text" id="db_name" name="db_name" class="form-control" placeholder="laravel_db" required>
                </div>
                <div class="mb-3">
                    <label for="db_user" class="form-label">Database User:</label>
                    <input type="text" id="db_user" name="db_user" class="form-control" placeholder="root" required>
                </div>
                <div class="mb-3">
                    <label for="db_password" class="form-label">Database Password:</label>
                    <input type="password" id="db_password" name="db_password" class="form-control" placeholder="password">
                </div>
                <button type="submit" class="btn btn-primary">Install</button>
            </form>
        </div>
    </div>
</div>
</body>
</html>
4. Define Routes
Add routes for the installer in routes/web.php.
use App\Http\Controllers\InstallController;

Route::get('/install', [InstallController::class, 'showInstallForm'])->name('install.form');
Route::post('/install', [InstallController::class, 'install'])->name('install');
5. Automate Database Configuration
Automatically run migrations and seeders after updating the .env file to ensure the database is ready for use.
Conclusion
By implementing this guide, you can create a seamless Laravel One-Click Installer that simplifies the setup process for your project. This not only enhances user experience but also ensures proper configuration of your application with minimal effort. Add professional design touches to your Blade page to create a polished and user-friendly interface.
Start building your installer today and elevate your Laravel project!

I’m Abhishek, a DevOps, SRE, DevSecOps, and Cloud expert with a passion for sharing knowledge and real-world experiences. I’ve had the opportunity to work with Cotocus and continue to contribute to multiple platforms where I share insights across different domains:
-
DevOps School – Tech blogs and tutorials
-
Holiday Landmark – Travel stories and guides
-
Stocks Mantra – Stock market strategies and tips
-
My Medic Plus – Health and fitness guidance
-
TrueReviewNow – Honest product reviews
-
Wizbrand – SEO and digital tools for businesses
I’m also exploring the fascinating world of Quantum Computing.
Best Cardiac Hospitals Near You
Discover top heart hospitals, cardiology centers & cardiac care services by city.
Advanced Heart Care • Trusted Hospitals • Expert Teams
View Best Hospitals